配置
在引入 Maomi.MQ 框架时,可以配置相关属性,示例和说明如下:
// this.
builder.Services.AddMaomiMQ((MqOptionsBuilder options) =>
{
    // 必填,当前程序节点,用于配置分布式雪花 id,
    // 配置 WorkId 可以避免高并发情况下同一个消息的 id 重复。
	options.WorkId = 1;

    // 是否自动创建队列
	options.AutoQueueDeclare = true;

    // 当前应用名称,用于标识消息的发布者和消费者程序
	options.AppName = "myapp";

    // 必填,RabbitMQ 配置
	options.Rabbit = (ConnectionFactory options) =>
	{
        options.HostName = Environment.GetEnvironmentVariable("RABBITMQ")!;
        options.Port = 5672;
		options.ClientProvidedName = Assembly.GetExecutingAssembly().GetName().Name;
	};
}, [typeof(Program).Assembly]);  // 要被扫描的程序集
开发者可以通过 ConnectionFactory 手动管理 RabbitMQ 连接,例如故障恢复、自定义连接参数等。
类型过滤器
类型过滤器的接口是 ITypeFilter,作用是扫描识别类型,并将其添加为消费者,默认启用 ConsumerTypeFilter、EventBusTypeFilter 两个类型过滤器,它们会识别并使用消费者模型和事件总线消费者模式,这两种模型都要求配置对于的特性注解。
此外还有一个动态消费者过滤器 DynamicConsumerTypeFilter,可以自定义消费者模型和配置。
如果开发者需要自定义消费者模型或者接入内存事件总线例如 MediatR ,只需要实现 ITypeFilter 即可。
通过过滤器的接口,可以实现 MiedatR、FastEndpoints 等自定义外部框架接入,也可以自由实现各类消费模式。
拦截器
Maomi.MQ 默认启用消费者模式和事件总线模式,开发者可以自由配置是否启用。
builder.Services.AddMaomiMQ((MqOptionsBuilder options) =>
{
	options.WorkId = 1;
	options.AutoQueueDeclare = true;
	options.AppName = "myapp";
	options.Rabbit = (ConnectionFactory options) =>
	{
        // ... ...
	};
},
[typeof(Program).Assembly],
[new ConsumerTypeFilter(), new EventBusTypeFilter()]); // 注入消费者模式和事件总线模式
另外框架还提供了动态配置拦截,可以实现在程序启动时修改消费者特性的配置。
builder.Services.AddMaomiMQ((MqOptionsBuilder options) =>
{
	options.WorkId = 1;
	options.AutoQueueDeclare = true;
	options.AppName = "myapp";
	options.Rabbit = (ConnectionFactory options) =>
	{
        // ... ...
	};
},
[typeof(Program).Assembly],
[new ConsumerTypeFilter(ConsumerInterceptor), new EventBusTypeFilter(EventInterceptor)]);
实现拦截器函数:
private static RegisterQueue ConsumerInterceptor(IConsumerOptions consumerOptions, Type consumerType)
{
	var newConsumerOptions = new ConsumerOptions();
	newConsumerOptions.CopyFrom(consumerOptions);

	// 修改 newConsumerOptions 中的配置

	return new RegisterQueue(true, newConsumerOptions);
}

private static RegisterQueue EventInterceptor(IConsumerOptions consumerOptions, Type eventType)
{
	if (eventType == typeof(TestEvent))
	{
		var newConsumerOptions = new ConsumerOptions();
		newConsumerOptions.CopyFrom(consumerOptions);
		newConsumerOptions.Queue = newConsumerOptions.Queue + "_1";

		return new RegisterQueue(true, newConsumerOptions);
	}
	return new RegisterQueue(true, consumerOptions);
}
开发者可以在拦截器中修改配置值。
拦截器有返回值,当返回 false 时,框架会忽略注册该消费者或事件,也就是该队列不会启动消费者。
序列化配置
默认情况下,Maomi.MQ 会内置 DefaultJsonMessageSerializer,使用 System.Text.Json 进行消息序列化和反序列化。
如果要切换或组合其它序列化协议,不需要替换 DI 中的 IMessageSerializer,而是通过 AddMaomiMQ 的 options.MessageSerializers 配置序列化器列表。
builder.Services.AddMaomiMQ((MqOptionsBuilder options) =>
{
    options.WorkId = 1;
    options.AppName = "myapp";

    options.MessageSerializers = serializers =>
    {
        // 框架默认已经包含 JSON 序列化器(DefaultJsonMessageSerializer)。
        // 在列表前面插入 Protobuf,可优先匹配 Protobuf 消息类型。
        serializers.Insert(0, new ProtobufMessageSerializer());

        // 如果你希望只使用某一种协议,也可以先清空默认列表:
        // serializers.Clear();
        // serializers.Add(new ProtobufMessageSerializer());
    };

    options.Rabbit = rabbit =>
    {
        rabbit.HostName = Environment.GetEnvironmentVariable("RABBITMQ")!;
        rabbit.Port = 5672;
    };
}, [typeof(Program).Assembly]);
当前 IMessageSerializer 只要求实现以下成员:
ContentTypeSerializerVerify<TObject>(TObject obj)SerializerVerify<TObject>()Serializer<TObject>(TObject obj)Deserialize<TObject>(ReadOnlySpan<byte> bytes)
示例:
public sealed class MyJsonSerializer : IMessageSerializer
{
    public string ContentType => "application/json";

    public bool SerializerVerify<TObject>(TObject obj) => true;

    public bool SerializerVerify<TObject>() => true;

    public byte[] Serializer<TObject>(TObject obj)
        => System.Text.Json.JsonSerializer.SerializeToUtf8Bytes(obj);

    public TObject? Deserialize<TObject>(ReadOnlySpan<byte> bytes)
        => System.Text.Json.JsonSerializer.Deserialize<TObject>(bytes);
}
ContentType 会写入消息头并用于消费者端选择反序列化器。跨语言或多序列化协议并存时,请确保每种序列化器使用唯一、稳定的 ContentType(例如 application/json、application/x-protobuf)。
如果使用 Protobuf:
Maomi.MQ.Message.Protobuf适配Google.Protobuf.IMessageMaomi.MQ.Message.Protobuf-net适配 protobuf-net(如[ProtoContract])
推荐按消息类型在 SerializerVerify 中做判定,实现“同一项目内多序列化器共存”。
消费者配置
Maomi.MQ 的消费者配置统一由 IConsumerOptions 表示。无论是 [Consumer] 特性、事件总线,还是动态消费者,最终都会落到这一组配置。
当前字段说明如下:
| 名称 | 类型 | 必填 | 默认值 | 说明 |
|---|---|---|---|---|
| Queue | string | 必填 | 无 | 队列名称(全局唯一,重复会抛异常) |
| DeadExchange | string? | 可选 | null | 死信交换机名称(配合 DeadRoutingKey 生效) |
| DeadRoutingKey | string? | 可选 | null | 死信路由键 |
| Expiration | int | 可选 | 0 | 队列过期时间(x-expires,单位毫秒) |
| Qos | ushort | 可选 | 100 | 预取数量(BasicQos 的 prefetchCount) |
| RetryFaildRequeue | bool | 可选 | true | 消费失败时是否 Nack(requeue: true) 放回原队列 |
| AutoQueueDeclare | AutoQueueDeclare | 可选 | None | 队列声明策略:None 跟随全局、Enable 强制声明、Disable 不声明 |
| BindExchange | string? | 可选 | null | 需要绑定的交换机名称 |
| ExchangeType | ExchangeType | 可选 | Fanout | 交换机类型:Fanout/Direct/Topic/Headers |
| RoutingKey | string? | 可选 | null | 绑定交换机时使用的路由键;为空时默认使用 Queue |
| IsBroadcast | bool | 可选 | false | 广播模式 |
补充说明:
RetryFaildRequeue = true与DeadRoutingKey同时配置时,失败消息会优先重回原队列,死信路由不会生效。AutoQueueDeclare = None时会继承AddMaomiMQ里的全局options.AutoQueueDeclare。
可以通过类型过滤器拦截并修改消费者配置,例如统一加队列前缀:
new ConsumerTypeFilter((consumerOptions, type) =>
{
    var newConsumerOptions = new ConsumerOptions();
    newConsumerOptions.CopyFrom(consumerOptions);

    newConsumerOptions.Queue = "app1_" + newConsumerOptions.Queue;

    // true 表示注册该消费者;false 表示忽略该消费者
    return new RegisterQueue(true, newConsumerOptions);
});
IRoutingProvider:作用、用法与分配优化
IRoutingProvider 用来统一“路由映射”逻辑,在两个时机会被调用:
- 消费者启动时:对
IConsumerOptions做最终修正(队列名、绑定交换机、路由键等)。 - 自动发布时(
AutoPublishAsync):对IRouterKeyOptions做最终修正(Exchange/RoutingKey)。
在编写程序代码时, [Consumer] 可以提前配置对应的结构,等程序运行时,你可以通过 IRoutingProvider 服务动态提供对应的最新配置,例如租户隔离,自动添加前后缀等。
注册方式:
services.AddSingleton<IRoutingProvider, MyRoutingProvider>();
基础实现示例(按环境加前缀):
using Maomi.MQ.Consumer;

public sealed class MyRoutingProvider : IRoutingProvider
{
    private readonly string _prefix;

    public MyRoutingProvider(IHostEnvironment env)
    {
        _prefix = env.IsDevelopment() ? "dev." : "prod.";
    }

    public IConsumerOptions Get(IConsumerOptions options)
    {
        var newOptions = new ConsumerOptions();
        newOptions.CopyFrom(options);
        newOptions.Queue = _prefix + options.Queue;
        return newOptions;
    }

    public IRouterKeyOptions Get(IRouterKeyOptions options)
    {
        return new RouterKeyOptions(_prefix + options.RoutingKey, options.Exchange);
    }

    private sealed class RouterKeyOptions : IRouterKeyOptions
    {
        public RouterKeyOptions(string routingKey, string? exchange)
        {
            RoutingKey = routingKey;
            Exchange = exchange;
        }

        public string RoutingKey { get; }

        public string? Exchange { get; }
    }
}
上面的写法每次 Get 都会创建新对象。在高吞吐场景下,建议做“本地缓存 + 对象复用”,减少瞬时分配和 GC 压力。
优化思路:
- 规则是“纯函数”时(相同输入一定相同输出),可把映射结果缓存起来。
- 缓存 Key 使用稳定字段(如
Queue|BindExchange|RoutingKey)。 - 缓存 Value 使用只读对象;避免返回后被外部修改导致脏数据。
示例(ConcurrentDictionary 本地缓存):
using Maomi.MQ.Consumer;
using System.Collections.Concurrent;

public sealed class CachedRoutingProvider : IRoutingProvider
{
    private readonly string _prefix;
    private readonly ConcurrentDictionary<string, IConsumerOptions> _consumerCache = new();
    private readonly ConcurrentDictionary<string, IRouterKeyOptions> _publishCache = new();

    public CachedRoutingProvider(IHostEnvironment env)
    {
        _prefix = env.IsDevelopment() ? "dev." : "prod.";
    }

    public IConsumerOptions Get(IConsumerOptions options)
    {
        var key = $"{options.Queue}|{options.BindExchange}|{options.RoutingKey}|{options.ExchangeType}|{options.IsBroadcast}";
        return _consumerCache.GetOrAdd(key, _ =>
        {
            var newOptions = new ConsumerOptions();
            newOptions.CopyFrom(options);
            newOptions.Queue = _prefix + options.Queue;
            return newOptions;
        });
    }

    public IRouterKeyOptions Get(IRouterKeyOptions options)
    {
        var key = $"{options.Exchange}|{options.RoutingKey}";
        return _publishCache.GetOrAdd(key, _ =>
            new RouterKeyOptions(_prefix + options.RoutingKey, options.Exchange));
    }

    private sealed class RouterKeyOptions : IRouterKeyOptions
    {
        public RouterKeyOptions(string routingKey, string? exchange)
        {
            RoutingKey = routingKey;
            Exchange = exchange;
        }

        public string RoutingKey { get; }

        public string? Exchange { get; }
    }
}
注意事项:
IRoutingProvider在消费者启动和消息发布路径上都会被调用,尽量保持无阻塞、低开销。- 若路由规则依赖会变化的配置(例如远程配置中心),请设计缓存失效策略(版本号、定时清理等)。
- 如果映射后对象还会被后续代码修改,不要直接缓存可变实例,避免并发读写问题。
环境隔离
在开发中,往往需要在本地调试,本地程序启动后会连接到开发服务器上,一个队列收到消息时,会向其中一个消费者推送消息。那么我本地调试时,发布一个消息后,可能本地程序收不到该消息,而是被开发环境中的程序消费掉了。
这个时候,我们希望可以将本地调试环境跟开发环境隔离开来,可以使用 RabbitMQ 提供的 VirtualHost 功能。
首先通过 put 请求 RabbitMQ 创建一个新的 VirtualHost,请参考文档:https://www.rabbitmq.com/docs/vhosts#using-http-api
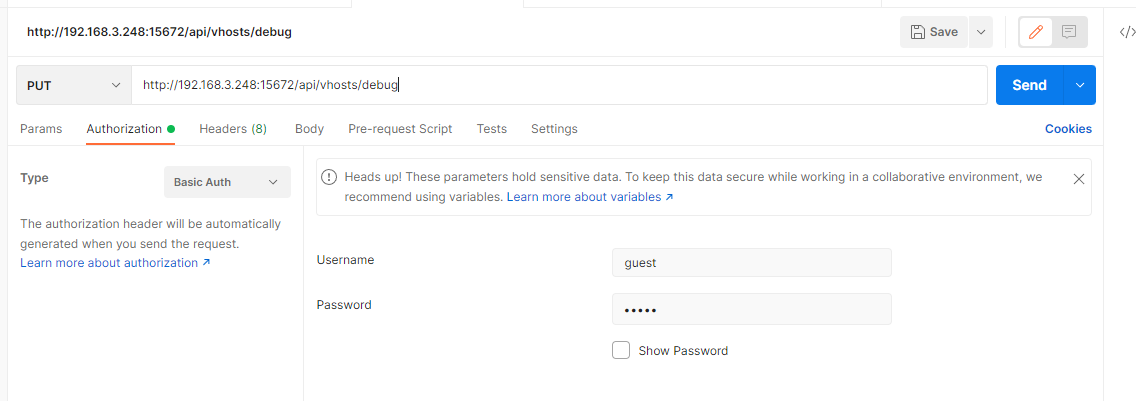
然后在代码中配置 VirtualHost 名称:
builder.Services.AddMaomiMQ((MqOptionsBuilder options) =>
{
	options.WorkId = 1;
	options.AutoQueueDeclare = true;
	options.AppName = "myapp";
	options.Rabbit = (ConnectionFactory options) =>
	{
        options.HostName = Environment.GetEnvironmentVariable("RABBITMQ")!;
        options.Port = 5672;
#if DEBUG
		options.VirtualHost = "debug";
#endif
		options.ClientProvidedName = Assembly.GetExecutingAssembly().GetName().Name;
	};
}, [typeof(Program).Assembly]);
当本地调试时,发布和接收消息都会跟服务器环境隔离。
雪花 id 配置
Maomi.MQ.RabbitMQ 使用了 IdGenerator 生成雪花 id,使得每个事件在集群中都有一个唯一 id。
框架通过 IIdFactory 接口创建雪花 id,你可以通过替换 IIdFactory 接口配置雪花 id 生成规则。
services.AddSingleton<IIdFactory>(new DefaultIdFactory((ushort)optionsBuilder.WorkId));
示例:
public class DefaultIdFactory : IIdFactory
{
    /// <summary>
    /// Initializes a new instance of the <see cref="DefaultIdFactory"/> class.
    /// </summary>
    /// <param name="workId"></param>
    public DefaultIdFactory(ushort workId)
    {
        var options = new IdGeneratorOptions(workId) { SeqBitLength = 10 };
        YitIdHelper.SetIdGenerator(options);
    }

    /// <inheritdoc />
    public long NextId() => YitIdHelper.NextId();
}
IdGenerator 框架生成雪花 id 配置请参考:
https://github.com/yitter/IdGenerator/tree/master/C%23
调试
Maomi.MQ 框架在 nuget.org 中有符号包,需要调试 Maomi.MQ 框架时会非常方便。
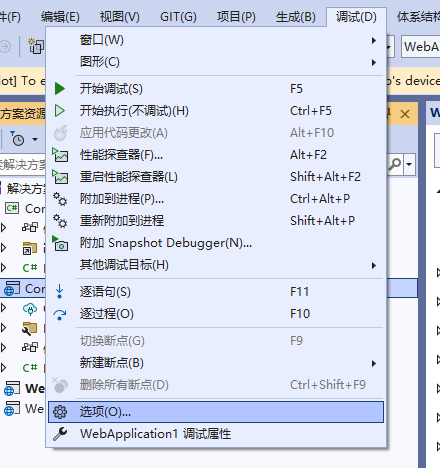
第一次使用时建议加载所有模块,并启动程序。
后面可以手动选择只加载那些模块。

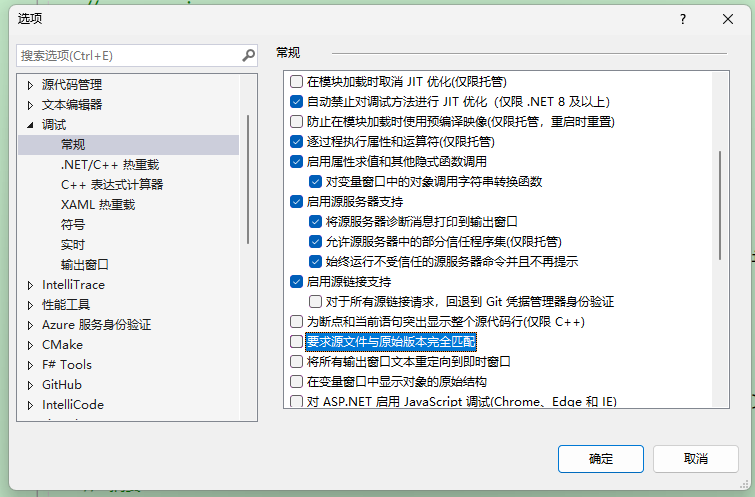
F12 到要调试的位置,启动程序后即可进入断点。

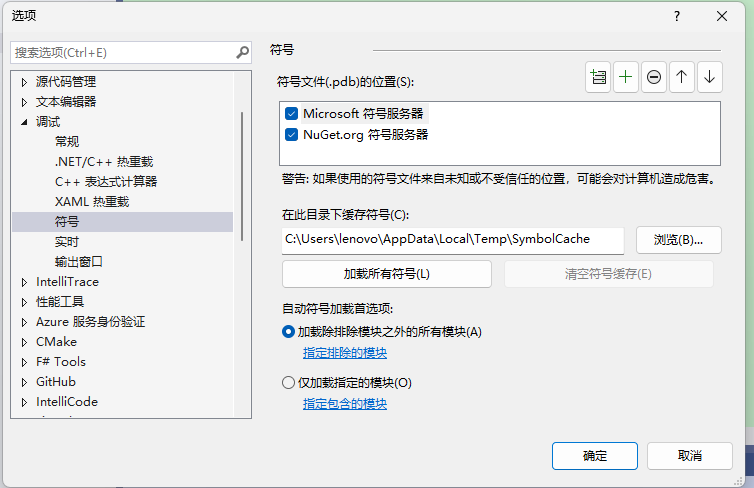
如果需要调试 Maomi.MQ.RabbtiMQ,可以在程序中加一个断点(不是在 Maomi.MQ 中),然后等待程序启动到达这个断点后,配置符号,点击加载所有符号。
然后在 Maomi.MQ.RabbitMQ 中设置断点即可进入调试。
